Loose Change Holder
My Research and Designs
Design Process
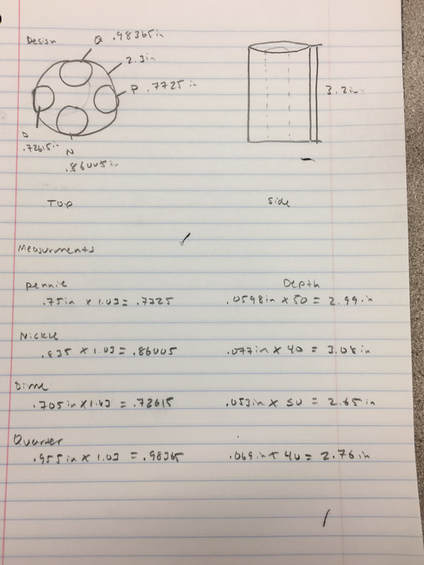
The first thing I did in Inventor was draw a circle with a dimension of 2.3 inches. I finished the sketch and extruded the circle 3.2 inches.
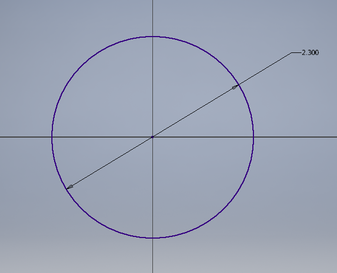
After the circle is extruded I started a new sketch on the top of the circle. I drew four more circles and changed the dimensions to fit the four coins. Starting in the top right was the penny with a dimension of .773 inches, nickel with a dimension of .860 inches, dime with a dimension of .726 inches and finally the quarter with a dimension of .984 inches.
Once the circles were correctly sized I moved the circles to hang a little of the side of the extruded circle. This will allow the user to access the coins easily.
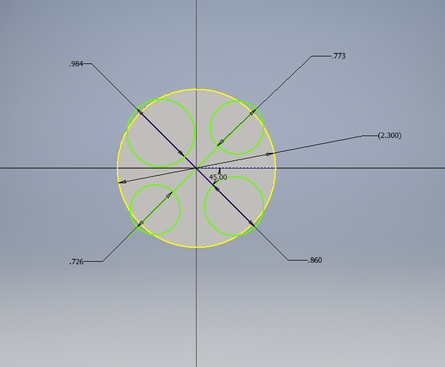
Next I extruded each of the circles. Part of the requirements were to create a device that could hold 50 pennies, 40 nickles, 50 dimes and 40 quarters. In my research I found the width of each coin. To determine how far I needed to extrude each circle I took the width of each coin and multiplied it by the number of coins I needed to hold. The penny needed to be extruded 2.99 inches, the nickle 3.08 inches, the dime 2.65 inches and the quarter 2.76 inches.
Next I extruded each of the circles. Part of the requirements were to create a device that could hold 50 pennies, 40 nickles, 50 dimes and 40 quarters. In my research I found the width of each coin. To determine how far I needed to extrude each circle I took the width of each coin and multiplied it by the number of coins I needed to hold. The penny needed to be extruded 2.99 inches, the nickle 3.08 inches, the dime 2.65 inches and the quarter 2.76 inches.
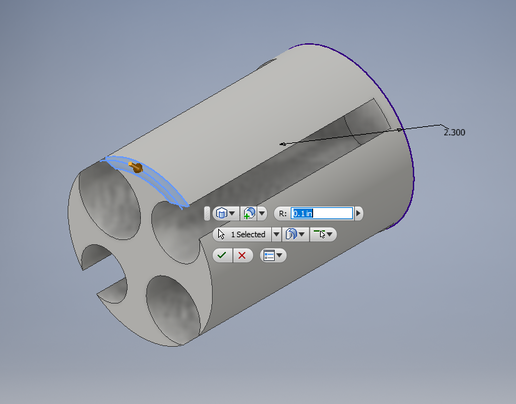
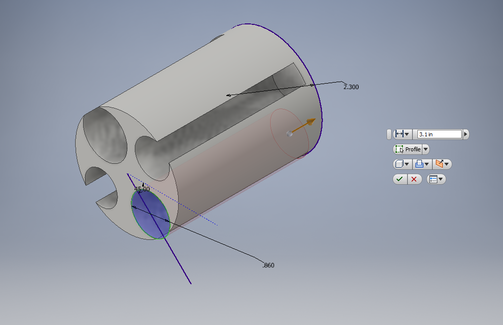
Once all the circles were extruded I decided to fillet the edges to make them have smooth look to them. On the outside edges I fillet them .1 inches. For the inside of the circles I fillet them .08 inches.
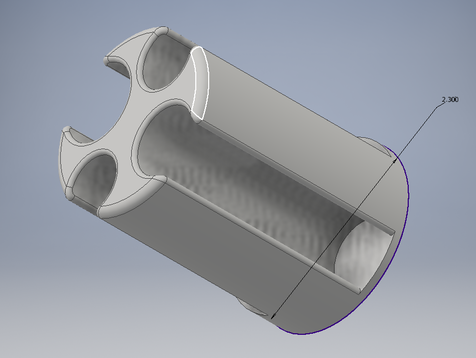
Here is the final design on Inventor. Don't forget to save it to your H-drive.
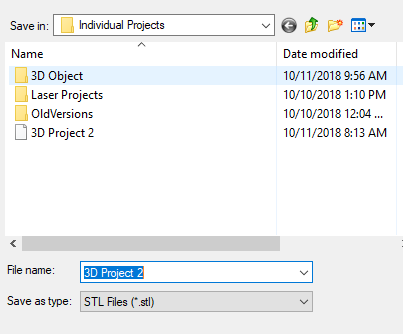
When saving your file make sure you change your save as type of an STL file. This will make it compatible with the 3D printer.
|
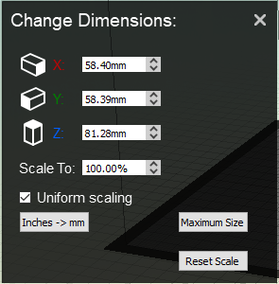
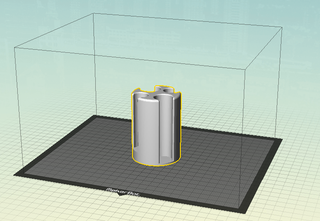
Open your file on Makerbot and change the dimensions of your object as needed. You can also change the orientation of your object so there are no "hanging" side. To the right is my object dimensioned and oriented in the correct way.
|
|
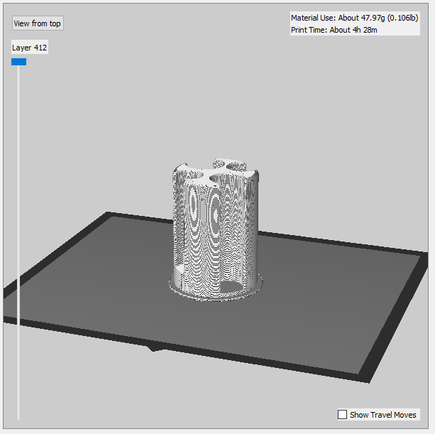
Here is the preview screen on makerbot. It says my print should take about 4 hours and 28 minutes.
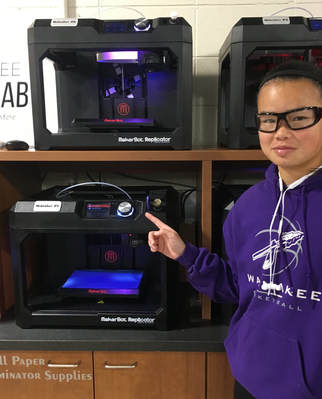
This is a picture of me using/setting up my 3D printer.
|
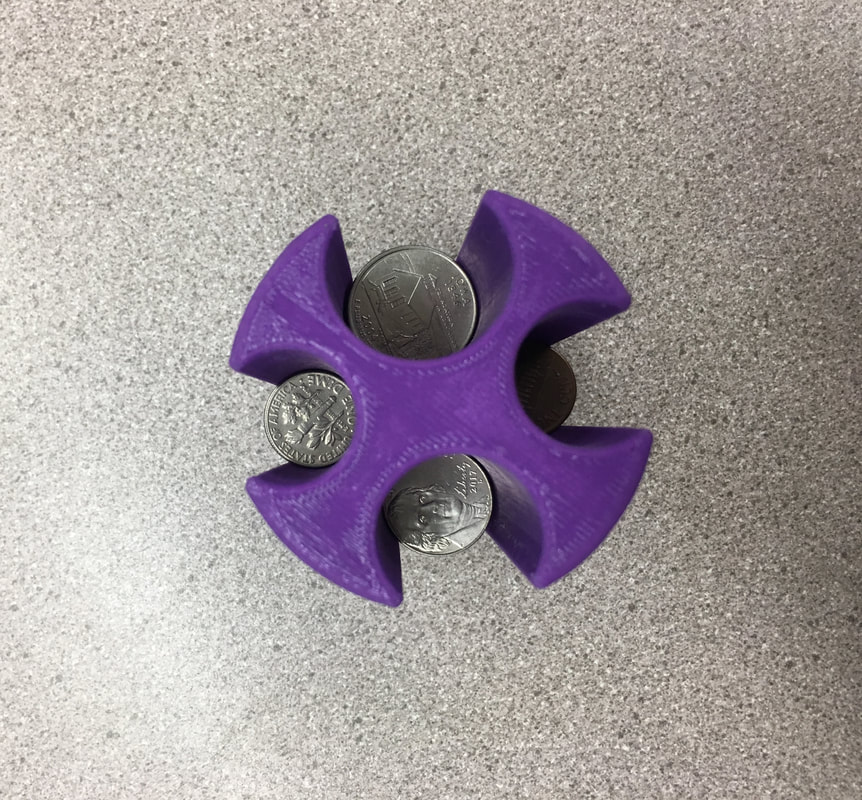
To the left is a top view of my coin holder and to the right is the side view. I decided to keep my 3D print in my car because I always have loose change and now I have something to organize it.
|

|
Summary
I learned a lot during my individual 3D project. While most of it was a review from freshman year Intro to Engineering, I did learn how to use the circular patter when creating my coin circles. When I was down in the Innovation Center I learned how to change the filament.
A lot of this project was trial and error. Sometimes I would try something to o see if it was more efficient than the prototype I already created. For example, I originally wasn't going to use the fillet tool on the outsides. However after I applied it to my design I decided the object looked more appealing with the fillet so I left it. One last thing I learned while working with 3D printers is that the print time takes a really long time.
A lot of this project was trial and error. Sometimes I would try something to o see if it was more efficient than the prototype I already created. For example, I originally wasn't going to use the fillet tool on the outsides. However after I applied it to my design I decided the object looked more appealing with the fillet so I left it. One last thing I learned while working with 3D printers is that the print time takes a really long time.
