Inventor
Inventor is a 3D mechanical solid modeling design software developed by Autodesk. The software has the ability to turn simple 2D designs into high grade 3D images. With a few dimensions, angles and a couple extrusions we are able to create drawings, parts, presentations and put together assemblies. In our IDEA class we are going to use Inventor to design and develop six widgets.
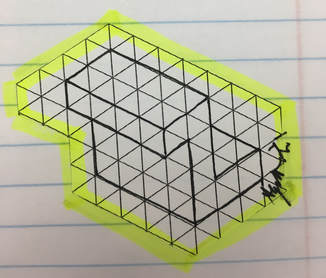
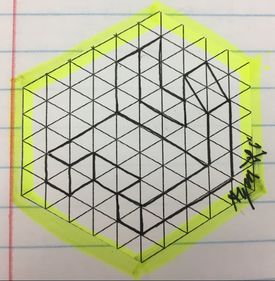
Widgets Sketches
|
|
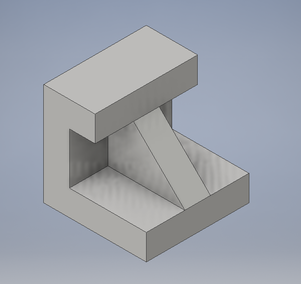
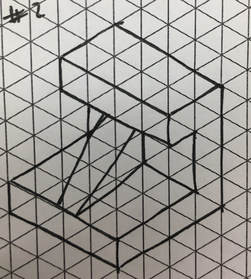
Widget #3
Below is the step by step process of how I designed widget number 3
|
|
I started by making a sketch in the XY plane. To make my life a little easier I decided to sketch the side view of my widget. Pictured below is the side view sketch of my widget, this is the 2D version of my widget. To the right of that is the extruded (3D) version of my widget.


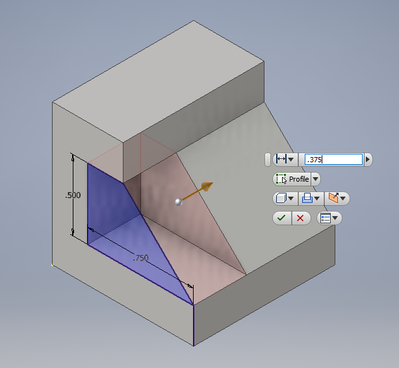
Next I created another sketch in the XY plane on the left side of my widget. To do this I started on the bottom right side of my widget, I measured .25 inches up and started a line, then I continued the line left .75 inches, next up .5 inches, then to the right .25 inches finally connecting the line back to the beginning, making a quadrilateral looking shape. After all the lines were connected I extruded the quadrilateral .375 inches in. I then did the same thing to the other side. This left a little section in the middle of my shape completing my widget.
The Remaining Five Widgets
3D Printing Widget #2
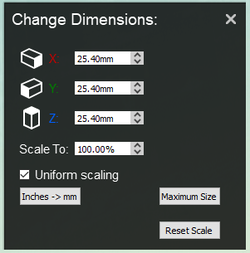
The first thing you need to do in MakerBot is change your .ipt file to a STL file. This will allow the file your widget is saved on to be compatible with the MakerBot desktop. Next, you will need to resize your widget do not press the re scale button, instead find the change dimensions tab on the side and change the scaling to 1000%. This should change all of the dimensions to 25.40mm.
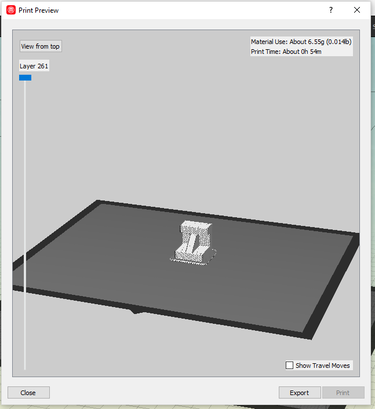
After you properly scale your widget you need to orient the widget correctly. In MakerBot it is important to orient your object correctly. You don't want to have any parts "hanging" off the side. This basically ensures that the machine has something to work off of when it's layering your widget. For my widget I had to rotate my object to the left and then 90 degrees to get bigger base on the bottom. Save the file from this screen onto your flash drive and then head down to the 3D printer.

To use the 3D printer you need to insert your flash drive into the USB slot. A screen will pop up, you will need to use the wheel to scroll to USB and find your file, press the wheel to select. The machine will then start to heat up, when it reaches the desired heat the printer will start printing your widget. My widget took 47 minutes to make.
The Final Product


Summary
I was able to learn the basics of Inventor back in Intro to Engineering with Mr. Willaur . We had to build and assemble a telescope. Later in the semester we had a project where we had to reverse engineer a bubble gun and then redesign the parts to make them better. Both of these projects our groups had to use Inventor. So far in IDEA, I have refreshed my memory of how to use the program.
Along, with relearning the basics of Inventor I was able to learn how to use a completely new program called MakerBot. This new software allows you to take your 3D designs that you made in Inventor and turn them into a file that is compatible with the MakerBot software. While using MakerBot I learned that you need to orient your widget correctly so that there aren't any parts "hanging off". Lastly, I learned that when designing your widget in Inventor each little box is .25 inches instead of 1 inch.
While using the 3D printer I leaned that you need to convert your file over to a STL file. This allows the MakerBot software to work, which will then allow the 3D printer to work too. From the video we watched in class I learned that 3D printers are being used for more than just basic plastic objects, they can be used to design human tissue too.
